 English
  Français
 Deutsch
 Español
 Italiano
 Nederlands
 Português
 Русский
 中文 (中国)
 日本語
日本語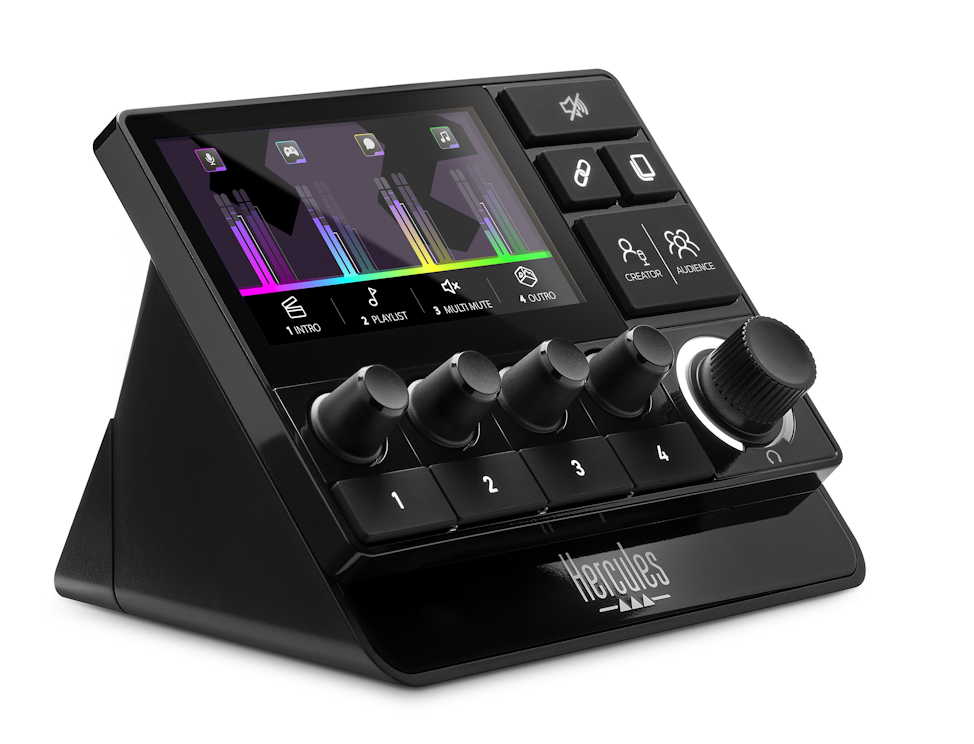
To offer a latency-free voice return, the Hercules Stream 200 XLR processes your audio signal directly within its sound card, in a hardware manner, similar to professional-grade sound cards.
As each streamer uses a microphone, possesses a unique voice, and operates within a distinct streaming environment, it's therefore crucial to be able to customize and refine one's voice using the equalizer (EQ). Additionally, managing dynamics through a compressor and reducing ambient noise via the Noise Gate are equally essential.
You can access these settings under Settings => XLR Microphone.
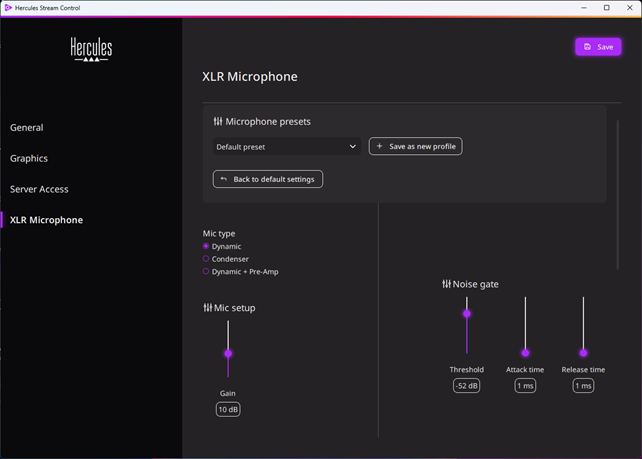
Step 1: Choose your microphone type.
Start by choosing the type of microphone setup you will be using:
- Dynamic (microphone that does not require 48Volts phantom power - such as a "vocal" type like a Shure SM58)
- Condenser (microphone that requires 48Volts phantom power - like a Rode NT1-A)
- Dynamic + Preamp (activates the 48Volts phantom power to power the provided Hercules preamp, adding 25dB of analog GAIN, suitable for microphones requiring significant amplification, such as the Shure SM7B.).
*In addition to switching this setting, ensure that the "48V" button on the back of the STREAM 200 XLR is activated.
This is an additional safety measure to avoid any damage to an incompatible microphone, such as a ribbon microphone.
Once you have selected your microphone type, it's time to adjust your microphone.
Step 2: Adjust the Gain
This is the most crucial step to ensure optimal processing later on.
To do this:
1- Ensure that your microphone volumes are set to 100% on your STREAM 200 XLR
2- Speak into your microphone naturally and smoothly, checking the audio level using the VU meters on the screen of your STREAM 200 XLR.
3- Use the gain setting to add between 0dB and +25dB of gain to the signal if necessary, so that the VU meters oscillate within the "Good" zone as shown in the following image.
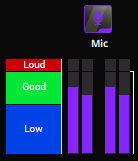
Tip: If increasing the gain via the software is not sufficient, feel free to use the provided Hercules preamp to add +25dB of analog gain
Step 3: How to use the Noise Gate
A noise gate is an audio processing effect designed to prevent unwanted sounds from the incoming signal from passing through the audio circuit, aiming to achieve an output with minimal unwanted noise.
Its typical use involves setting it to cut off any signal that doesn’t exceed a certain volume threshold. It can be employed to avoid recording background noises on stage or in a studio, such as breathing sounds, minor impacts, or movements.
A well-configured noise gate with your STREAM 200 XLR will allow only your voice to pass through, attenuating surrounding noises on your streaming setup, such as mouse clicks, keyboard typing, or other friction sounds.
The Noise Gate comprises 3 settings:
1. Threshold (-100dB to -32dB): The threshold is the level at which the Noise Gate activates to cut off sound.
- If set to the minimum at -100dB: the noise gate allows all sounds exceeding 100dB, making it nearly inactive.
- If set to the maximum at -32dB: the noise gate cuts the volume as soon as the incoming sound to the microphone falls below -32dB.
2. Attack time (1ms to 250ms): The attack time is how long the Noise Gate takes to open after the threshold is crossed.
- A short attack time opens the sound quickly when you speak and is suitable for voice (between 1 and 10ms).
- A long attack time (50 to 250ms) gradually opens the sound when you begin speaking.
3. Release time (1ms to 250ms): The release time is how long the Noise Gate takes to close once you stop speaking and the volume falls below the threshold.
- A short release time (1 to 10ms) results in an instant cut-off, which might lead to choppy speech but can be suitable if there's significant background noise in your environment.
- A longer release time (between 80ms and 150ms) is generally suitable for voice usage.
Tips for properly adjusting your noise gate:
1. Set your gain correctly as in Step 2
2. Configure a short attack time (1ms) and a long release time (around 100ms).
3. Set the Threshold to -100dB => In this case, the Noise Gate is almost deactivated.
4. Speak into the microphone normally and raise the Threshold until your voice is cut off by the Noise Gate.
5. Then, decrease the Threshold by a few decibels to ensure that the Noise Gate lets your voice pass even when speaking softly.

Step 4: Setting up the Compressor.
The compressor reduces the level of an audio signal when its amplitude surpasses a certain threshold, based on the chosen compression ratio. It passes through a signal whose level consistently stays below the threshold; it attenuates a signal with a constant level above the threshold in a way that the level increases ratio times slower than an untreated signal.
When used with spoken voice, a compressor helps achieve a more consistent audio volume based on the distance from your mouth to the microphone and the intensity of speech. This allows your audience to better hear and understand you.
The compressor includes these settings:
1. Threshold (-40dB to 0dB): The threshold is the level at which the compressor activates to smooth out the sound.
- Set at minimum (-40dB): the compressor activates, compressing all signals above -40dB.
- Set at maximum (0dB): the compressor is nearly inactive, except if you exceed 0dB (in this case, it can serve as a limiter if you set the ratio to its maximum value).
2. Attack time (1ms to 250ms): The attack time is how long the compressor takes to activate after the threshold is crossed.
- A short attack time compresses the sound quickly when you speak and is suitable for voice (between 1 and 10ms).
3. Release time (1ms to 250ms): The release time is how long the compressor takes to deactivate when the threshold is crossed downward.
- A short release time (1 to 10ms) results in very fast compression but with audible level differences.
- A longer release time (between 80ms and 150ms) is generally suitable for voice usage.
4. Ratio (1 to 10): The ratio, also known as "compression ratio," is the rate at which the signal above the threshold is reduced.
- Ratio of 1: no compression is applied.
- Ratio of 4: suitable for spoken voice.
- Ratio of 10: suitable as a limiter to compress any "shouted" voice.
5. Bias Gain (0 to +18dB): Bias Gain is a gain after the compressor. It helps recover the sound volume after it has been compressed.
- The lower your Threshold, the more useful it is to apply gain after compression.
Step 5: Using the Equalizer
Commonly referred as EQ, the graphic equalizer allows you to adjust the spectral balance of your voice signal by defining the amplitude (in dB) of each frequency band it comprises (in Hz).
The selected frequencies have been carefully chosen for voice usage and offer a broad range of adjustments to compensate for your microphone's frequency response (and your vocal cords!).
Here are the details of the frequency bands and settings chosen to enhance your voice:
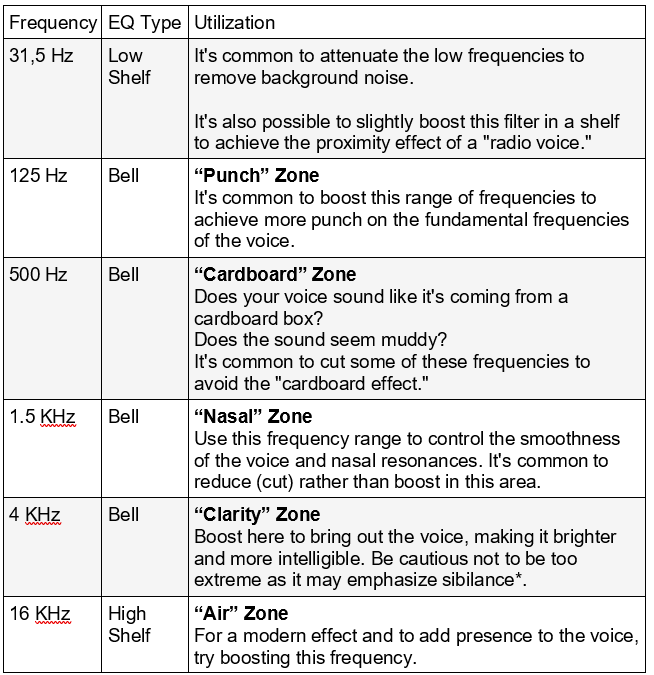
*Sibilance refers to the strong and high-pitched sounds, like "s," "z," or "sh," which create a hissing or whistling effect when pronounced forcefully. These sounds can be perceived as unpleasant if they are too pronounced or dominate the speech.
Here you are, you are now equipped to adjust your voice and microphone like professionals!